How Magic Studio Works From Upload to Final Photo
Magic Studio takes a small set of ordinary photos and uses them to produce a larger set of AI-generated professional portraits. The short version is simple: upload recent photos, let the system build a model of your appearance, look through the results and only keep the images that still look like you.
Independent editorial guide. Some pages on this site contain affiliate links; this educational page intentionally has no coupon block.
The important part is not pressing the button. It is preparing good source pictures and reviewing the final outputs with a human eye.
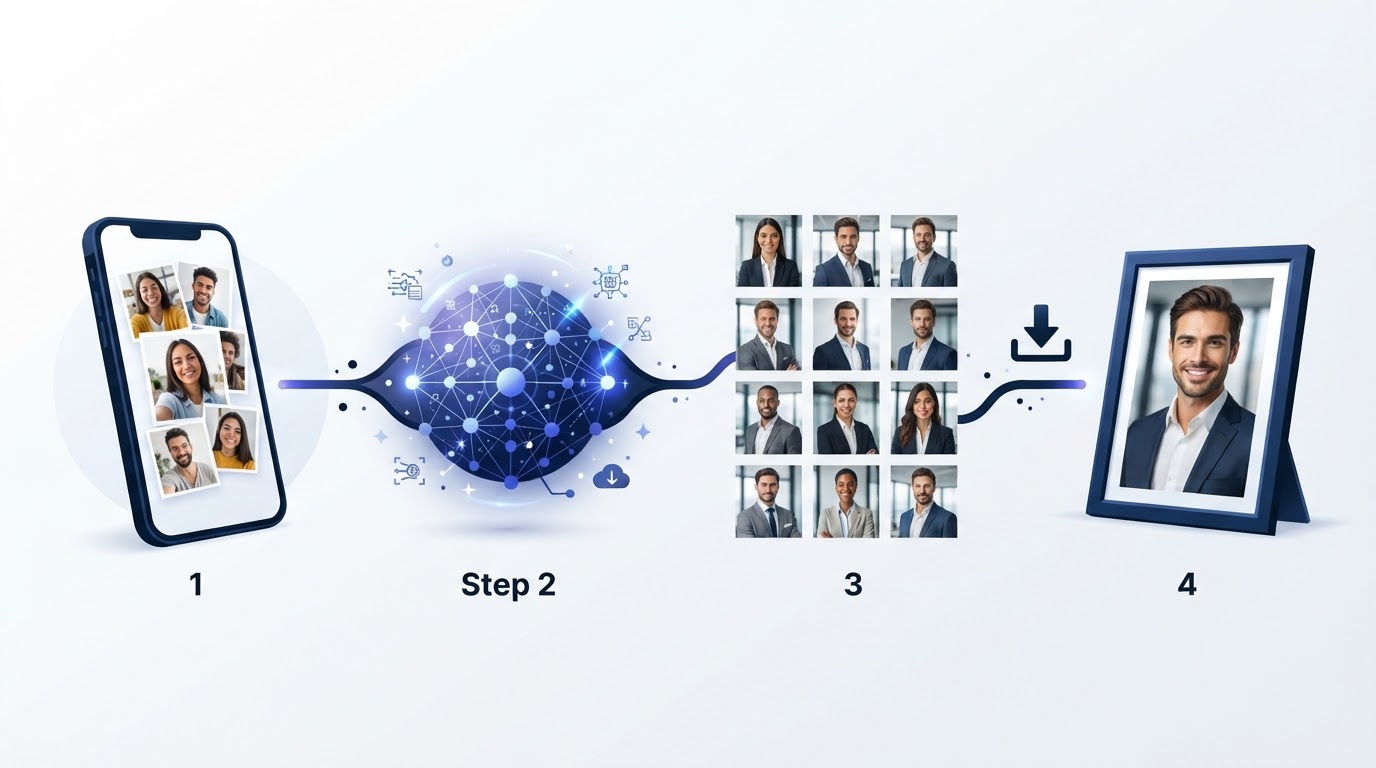
The process in four stages
| Stage | What happens | Your job |
|---|---|---|
| Upload | You provide several pictures | Pick recent, clear photos of only you |
| Learning | The AI looks for stable features | Give it enough variety without changing your look |
| Generation | It creates professional-style portraits | Wait for the result window |
| Selection | You download the useful headshots | Check likeness and small visual errors |
The official homepage describes the flow as upload photos, let the AI learn how you look, then receive headshots. It currently says individual results are ready in about 15 minutes. That is an estimate, not a deadline: allow more time if you need a finished image for a job application or event.
Stage one: choosing the right uploads
The source pictures are the raw material. You do not need studio images. Everyday photos can work very well when your face is clear, the light is decent and the pictures show your present-day appearance.
Aim for a group of 10 or more. Include a few straight-on images and a few gentle angle changes. Make sure the collection shows your normal hairstyle, facial hair, glasses and skin tone. If you want the final output to look like you on an ordinary working day, your uploads should show that person.
Avoid the obvious traps: blurry night photos, group shots, photos with a friend's shoulder in frame, heavy beauty filters, sunglasses and images from years ago. An AI model cannot fairly guess what is hidden or resolve conflicting versions of you.
For a fuller checklist, read our upload photo tips.
Stage two: how the AI learns your look
The system uses your uploads to learn visual patterns such as face shape, hair, eyes and proportions. It then applies those patterns to a set of professional headshot styles. It is not taking a real photograph in a real place. The office, wardrobe and background may be generated elements.
That is why a generated image can look polished but still need checking. The broader picture may be convincing while a glasses edge, earring, tooth, neckline or background detail is not. Think of the AI as a fast first draft of a portrait session, not an infallible camera.
When photos consistently show a feature, the service has a better chance of retaining it. If you wear glasses every day, include several clear images with them. If you have recently changed your hair or grown a beard, use new photos rather than mixing old and new.
Stage three: generating headshots
Magic Studio currently advertises individual packages from $59, including 50 headshots across five looks and a stated delivery time of 15 minutes. The number of images gives you options, but do not assume every output will be a keeper. The real goal is to find a small group that looks accurate, professional and useful for the place you plan to use it. Compare packages in our pricing guide.
Team accounts use an extra layer of coordination. An admin creates a team, invites colleagues and sets a shared style. The provider says team members can upload their own pictures, and that a team's model training and generation may take 30 minutes to one hour. Read our AI headshots for teams guide if you are managing that process.
Stage four: selecting the final photo
Do not select on first impression. Open candidates at full size, then shrink them. Both views reveal different problems.
At full size, check:
- whether your face, hair and glasses match your current appearance;
- whether the eyes, teeth, ears and jewellery look natural;
- whether clothing and the background make sense; and
- whether anything looks painted, waxy or oddly smooth.
At small size, check whether your face is easy to recognise, whether the expression feels warm and whether the crop works in a circle. This is especially important for LinkedIn and internal directories.
Ask one colleague who knows you well to pick their top three without seeing your choice. If they pick the same images, you are likely close. If they hesitate, do not force the most glamorous result. Choose the one that reads most honestly.
What style should you choose?
Use the place where the image will appear as your guide. A job-seeker's LinkedIn photo needs clarity and approachability. A consultant may use a little more warmth. A company directory benefits from a simple, consistent background. A dramatic editorial look is rarely necessary.
The best test is future-proofing. Would you be comfortable using this image on a video-call profile, in a speaker bio and on a client-facing website? If not, it is probably too stylised for a core professional photo.
What AI headshots are not good for
They should not be used for ID cards, legal identification, security passes or anything requiring an exact photographic record. They are also a poor substitute for a planned campaign shoot where the product, workplace or uniform must be shown precisely.
Use the tool for professional presentation: social profiles, company bios, directories, pitch decks and personal websites. Keep claims about your role, credentials and employer in the profile text, where they can be properly verified.
A useful pre-flight check
Before you start, have these ready:
- Ten or more clear, recent pictures.
- A brief purpose: LinkedIn, a company page, a speaker bio or several uses.
- One realistic wardrobe direction.
- A little time to review the full set, not just download the first image.
- Permission from anyone whose image you are uploading on behalf of.
This five-minute preparation has a larger effect on quality than endlessly comparing styles afterwards.
FAQs
Do I need professional photos to use Magic Studio?
No. Clear, recent everyday photos are the intended starting point. Good light, variety and an accurate current appearance matter more than a studio setting.
How long does Magic Studio take?
Its current individual page says about 15 minutes. Treat that as a guide and leave extra time when you have a deadline. Team guidance lists 30 minutes to one hour for the wider team process.
Will every AI headshot look usable?
No. Review every image carefully. A useful package gives you several believable candidates, not a guarantee that every variation is perfect.
Can I use the headshots commercially?
The Magic Studio teams FAQ says customers have rights to use images generated from their own photo inputs, including commercial use, subject to the current terms. Confirm the latest terms for your use case.
Sources and editorial note
Workflow, timing and current package claims were checked against the Magic Studio homepage and teams FAQ on 20 July 2026. This educational guide does not include a coupon block; readers can use the site navigation for current offers.
Related guides
Upload Photo Tips for Better AI Results
The practical do/don't list for input photos, light, framing and features.
Magic Studio Review for Professional AI Headshots
Strengths, realistic expectations and who the tool suits best.
AI Headshots for Teams Without the Photo-Day Chaos
Plan a consistent team rollout with pilots, checklists and governance.